Manual Testing Course-Day 15
What is Monkey Testing in Software Testing?
Introduction
Monkey testing is a technique in software testing where the user tests the application by providing random inputs and checking the behavior (or try to crash the application). Mostly this technique is done automatically where the user enters any random invalid inputs and checks the behavior.
As said earlier, there are no rules; this technique does not follow any predefined test cases or strategy and thus works on tester’s mood and gut feeling.

Many a time, this technique is automated or rather I should say that you can write programs/scripts that can generate random inputs and feed into the application under test and analyze the behavior. This technique works very well when doing load/stress testing when you try to break your application by proving non-stop random inputs.


Before I speak about “Monkey”, let me introduce you to “Horse”.
You see a Bridle in Horse right? It is used to direct and control the horse so that it does not loses its focus and concentrates only on running straight on the road.

Similarly, be it manual or Automation, we are like a horse in testing because we are directed and driven by the test cases/plans and strategies, and controlled by the quality metrics. Because we have a bridle around us, we don’t want to divert our focus and strictly concentrate on the set of test cases and obediently execute them.
It’s perfectly fine to be a horse, but sometimes don’t you enjoy being a Monkey?
Monkey testing is all about “do what you want; automatically”.
This testing technique is a bit chaotic because it does not follow any specific pattern. But the question here is
WHY?
Whenever you are exposing a big web application to the world, could you imagine the kind of users you are catering your application? There are definitely some good users, but you cannot be very sure that there will not be any nasty users. There are “n” numbers of nasty users, who are also like monkeys and love to play around with the application and provide strange or large inputs or break the applications.
Hence to test on those lines, we testers also have to become Monkey, think and eventually test it so that your application is safe from the outside nasty monkeys.
Monkey Types
There are 2: Smart and Dump
Smart Monkeys – A smart monkey is identified by the below characteristics:-
- Have a brief idea about the application
- They know where the pages of application will redirect to.
- They know that the inputs they are providing are valid or invalid.
- They work or focus to break the application.
- In case they find an error, they are smart enough to file a bug.
- They are aware of the menus and the buttons.
- Good to do stress and load testing.
Dumb Monkey – A dumb monkey is identified by the below characteristics:
- They have no idea about the application.
- They don’t know that the inputs they are providing are valid or invalid.
- They test the application randomly and are not aware of any starting point of the application or the end to end flow.
- Though they are not aware of the application, but they too can identify bugs like environmental failure or hardware failure.
- They don’t have much idea about the UI and functionality
The Result:
The bugs reported as a result of Monkey testing requires a detailed analysis. Because the steps of reproducing the bug are not known (most of the time), recreating the bug becomes difficult.
I feel that it would be good if this technique is done at the later phase of testing when all the functionalities are tested and there is some level of confidence on the effectiveness of the application. Doing it at the beginning of the testing phase would be a higher risk. If we are using a program or script that generates valid and invalid random inputs, the analysis becomes a bit easier.
Advantages of Monkey Testing
- Can identify some out of the box errors.
- Easy to set up and execute
- Can be done by “not so skilled” resources.
- A good technique to test the reliability of the software
- Can identify bugs which may have a higher impact.
- Not costly
Disadvantages of Monkey test
- This can go on for days till a bug is not discovered.
- Number of bugs are less
- Reproducing the bugs (if occurs) becomes a challenge.
- Apart from some bugs, there can be some “Not Expected” output of a test scenario, analysis of which becomes a difficult and time-consuming.
Conclusion
Though we say that the “Test Monkeys” or Monkey testing is chaotic, it is recommended to plan for it and assign some time at the later phase.
Though in initial phases of this technique, we may not find some good bugs, eventually it can discover some really good bugs like memory leaks or hardware crashing. In our regular course of testing, we normally ignore many cases thinking that “this scenario” will never happen, however, if happens, can lead to a serious impact (example – low priority and high severity bug).
Doing monkey testing can actually dig out these scenarios. We by any means we come across such a situation, I would recommend finding some time to analyze it and try to come up with a solution.
In my opinion, the best way is to have both the “Horse” and “Monkey” together.
Through “Horse” we can follow a well-planned, well defined and sophisticated method of testing, and through Monkey, we can undercover some really nasty situations; and together, they can contribute to achieve more quality and confidence in the software.
Ad hoc Testing
Ad hoc Testing is an informal or unstructured software testing type that aims to break the testing process in order to find possible defects or errors at an early possible stage. Ad hoc testing is done randomly and it is usually an unplanned activity which does not follow any documentation and test design techniques to create test cases.
.jpg)
Ad hoc Testing does not follow any structured way of testing and it is randomly done on any part of application. Main aim of this testing is to find defects by random checking. Adhoc testing can be achieved with the Software testing technique called Error Guessing. Error guessing can be done by the people having enough experience on the system to "guess" the most likely source of errors.
This testing requires no documentation/ planning /process to be followed. Since this testing aims at finding defects through random approach, without any documentation, defects will not be mapped to test cases. This means that, sometimes, it is very difficult to reproduce the defects as there are no test steps or requirements mapped to it.
When execute Adhoc Testing?
Ad hoc testing can be performed when there is limited time to do elaborative testing. Usually adhoc testing is performed after the formal test execution. And if time permits, ad hoc testing can be done on the system. Ad hoc testing will be effective only if the tester is knowledgeable of the System Under Test.
Types of Adhoc testing
There are different types of Adhoc testing and they are listed as below:
| Buddy Testing | Two buddies mutually work on identifying defects in the same module. Mostly one buddy will be from development team and another person will be from testing team. Buddy testing helps the testers develop better test cases and development team can also make design changes early. This testing usually happens after Unit Testing completion. |
| Pair testing | Two testers are assigned modules, share ideas and work on the same machines to find defects. One person can execute the tests and another person can take notes on the findings. Roles of the persons can be a tester and scriber during testing. Comparison Buddy and Pair Testing: Buddy testing is combination of unit and System Testing together with developers and testers but Pair testing is done only with the testers with different knowledge levels. (Experienced and non-experienced to share their ideas and views) |
| Monkey Testing | Randomly test the product or application without test cases with a goal to break the system. |
Best practices of Adhoc testing
Following best practices can ensure effective Adhoc Testing.
Good business knowledge
Testers should have good knowledge of the business and clear understanding of the requirements- Detailed knowledge of the end to end business process will help find defects easily. Experienced testers find more defects as they are better at error guessing.
Test Key Modules
Key business modules should be identified and targeted for ad-hoc testing. Business critical modules should be tested first to gain confidence on the quality of the system.
Record Defects
These Defect findings should be made as lesson learned and these should be reflected in our next system while we are planning for test cases.
Conclusion:
The advantage of Ad-hoc testing is to check for the completeness of testing and find more defects than planned testing. The defect catching test cases are added as additional test cases to the planned test cases.
In Software Engineering, Ad-hoc Testing saves lot of time as it doesn't require elaborate test planning , documentation and Test Case design.
____________
Usability Testing
Usability Testing also known as User Experience(UX) Testing, is a testing method for measuring how easy and user-friendly a software application is. A small set of target end-users, use software application to expose usability defects. Usability testing mainly focuses on user's ease of using application, flexibility of application to handle controls and ability of application to meet its objectives.
This testing is recommended during the initial design phase of SDLC, which gives more visibility on the expectations of the users.
Why do Usability Testing

Aesthetics and design are important. How well a product looks usually determines how well it works.
There are many software applications/websites, which miserably fail, once launched, due to following reasons -
- Where do I click next?
- Which page needs to be navigated?
- Which Icon or Jargon represents what?
- Error messages are not consistent or effectively displayed
- Session time not sufficient.
Software Engineering, Usability Testing identifies usability errors in the system early in the development cycle and can save a product from failure.
Example Usability Testing Test Cases
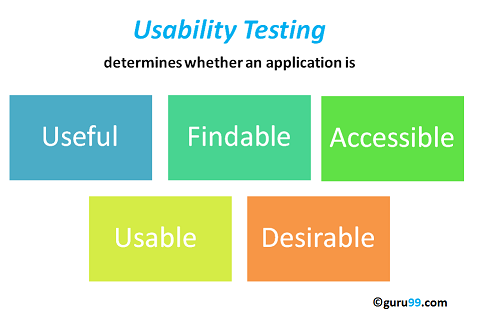
The goal of this testing is to satisfy users and it mainly concentrates on the following parameters of a system:
The effectiveness of the system
- Is the system is easy to learn?
- Is the system useful and adds value to the target audience?
- Are Content, Color, Icons, Images used are aesthetically pleasing?
Efficiency
- Little navigation should be required to reach the desired screen or webpage, and scrollbars should be used infrequently.
- Uniformity in the format of screen/pages in your application/website.
- Option to search within your software application or website.
Accuracy
- No outdated or incorrect data like contact information/address should be present.
- No broken links should be present.
User Friendliness
- Controls used should be self-explanatory and must not require training to operate
- Help should be provided for the users to understand the application/website
- Alignment with the above goals helps in effective usability testing
How to do Usability Testing: Complete Process
Usability testing process consists of the following phases

Planning:- During this phase the goals of usability test are determined. Having volunteers sit in front of your application and recording their actions is not a goal. You need to determine critical functionalities and objectives of the system. You need to assign tasks to your testers, which exercise these critical functionalities. During this phase, the usability testing method, number & demographics of usability testers, test report formats are also determined
Recruiting: During this phase, you recruit the desired number of testers as per your usability test plan. Finding testers who match your demographic (age, sex etc.) and professional ( education, job etc.) profile can take time.
Usability Testing: During this phase, usability tests are actually executed.
Data Analysis: Data from usability tests is thoroughly analyzed to derive meaningful inferences and give actionable recommendations to improve the overall usability of your product.
Reporting: Findings of the usability test is shared with all concerned stakeholders which can include designer, developer, client, and CEO
Methods of Usability Testing: 2 Techniques
There are two methods available to do usability testing -
- Laboratory Usability Testing
- Remote Usability Testing
Laboratory Usability Testing:. This testing is conducted in a separate lab room in presence of the observers. The testers are assigned tasks to execute. The role of the observer is to monitor the behavior of the testers and report the outcome of testing. The observer remains silent during the course of testing. In this testing, both observers and testers are present in a same physical location.
Remote Usability Testing: Under this testing observers and testers are remotely located. Testers access the System Under Test, remotely and perform assigned tasks. Tester's voice , screen activity , testers facial expressions are recorded by an automated software. Observers analyze this data and report findings of the test. Example of such a software - http://silverbackapp.com/

Research (Virzi, 1992 and Neilsen Landauer, 1993) indicates that 5 users are enough to uncover 80% of usability problems. Some researchers suggest other numbers.
The truth is , the actual number of the user required depends on the complexity of the given application and your usability goals. Increase in usability participants results into increased cost , planning , participant management and data analysis.
But as a general guideline, if you on a small budget and interested in DIY usability testing 5 is a good number to start with. If budget is not a constraint its best consult experienced professionals to determine the number of users.
UX Testing Checklist
The primary goal of this testing is to find crucial usability problems before the product is launched. Following things have to be considered to make a testing success:
- Start the UX testing during the early stage of design and development
- It's a good practice to conduct usability testing on your competitor's product before you begin development. This will help you determine usability standards for your target audience
- Select the appropriate users to test the system(Can be experts/non-experts users/50-50 of Experts and Non-Experts users)
- Use a bandwidth shaper . For instance , your target audience has poor network connectivity , limit network bandwidth to say 56 Kbps for your usability testers.
- Testers need to concentrate on critical & frequently used functionalities of the system.
- Assign a single observer to each tester. This helps observer to accurately note tester's behavior. If an observer is assigned to multiple testers, results may be compromised
- Educate Designers and Developers that this testing outcomes is not a sign of failure but it's a sign of Improvement
Usability Testing Advantages
As with anything in life, usability testing has its merits and de-merits. Let's look at them
- It helps uncover usability issues before the product is marketed.
- It helps improve end-user satisfaction
- It makes your system highly effective and efficient
- It helps gather true feedback from your target audience who actually use your system during a usability test. You do not need to rely on "opinions" from random people.
Usability Testing Disadvantages
- Cost is a major consideration in usability testing. It takes lots of resources to set up a Usability Test Lab. Recruiting and management of usability testers can also be expensive
However, these costs pay themselves up in form of higher customer satisfaction, retention and repeat business. Usability testing is therefore highly recommended.
Goal of Security Testing:
The goal of security testing is to:
- To identify the threats in the system.
- To measure the potential vulnerabilities of the system.
- To help in detecting every possible security risks in the system.
- To help developers in fixing the security problems through coding.
Principle of Security Testing:
Below are the six basic principles of security testing:
- Confidentiality
- Integrity
- Authentication
- Authorization
- Availability
- Non-repudiation
Major Focus Areas in Security Testing:
- Network Security
- System Software Security
- Client-side Application Security
- Server-side Application Security
Types of Security Testing:
- Vulnerability Scanning:
Vulnerability scanning is performed with the help of automated software to scan a system to detect the known vulnerability patterns. - Security Scanning:
Security scanning is the identification of network and system weaknesses. Later on it provides solutions for reducing these defects or risks. Security scanning can be carried out in both manual and automated way. - Penetration Testing:
Penetration testing is the simulation of the attack from a malicious hacker. It includes analysis of a particular system to examine for potential vulnerabilities from a malicious hacker that attempts to hack the system. - Risk Assessment:
In risk assessment testing security risks observed in the organization are analysed. Risks are classified into three categories i.e. low, medium and high. This testing endorses controls and measures to minimize the risk. - Security Auditing:
Security auditing is an internal inspection of applications and operating systems for security defects. An audit can also be carried out via line by line checking of code. - Ethical Hacking:
Ethical hacking is different from malicious hacking. The purpose of ethical hacking is to expose security flaws in the organization system. - Posture Assessment:
It combines security scanning, ethical hacking and risk assessments to provide an overall security posture of an organization.
What is Exploratory Testing?
EXPLORATORY TESTING is a type of software testing where Test cases are not created in advance but testers check system on the fly. They may note down ideas about what to test before test execution. The focus of exploratory testing is more on testing as a "thinking" activity.
Exploratory Testing is widely used in Agile models and is all about discovery, investigation, and learning. It emphasizes personal freedom and responsibility of the individual tester.
Under scripted testing, you design test cases first and later proceed with test execution. On the contrary, exploratory testing is a simultaneous process of test design and test execution all done at the same time.
Scripted Test Execution is usually a non-thinking activity where testers execute the test steps and compare the actual results with expected results. Such test execution activity can be automated does not require many cognitive skills.

Though the current trend in software testing is to push for automation, exploratory testing is a new way of thinking. Automation has its limits

Differences between Scripted and Exploratory Testing
| Scripted Testing | Exploratory Testing |
|---|---|
| Directed from requirements | Directed from requirements and exploring during testing |
| Determination of test cases well in advance | Determination of test cases during testing |
| Confirmation of testing with the requirements | Investigation of system or application |
| Emphasizes prediction and decision making | Emphasizes adaptability and learning |
| Involves confirmed testing | Involves Investigation |
| Is about Controlling tests | Is about Improvement of test design |
| Like making a speech - you read from a draft | Like making a conversation - it's spontaneous |
| The script is in control | The tester's mind is in control |
Exploratory testing -
- Is not random testing but it is ad-hoc testing with a purpose of find bugs
- Is structured and rigorous
- Is cognitively (thinking) structured as compared to the procedural structure of scripted testing. This structure comes from Charter, time boxing etc.
- Is highly teachable and manageable
- It is not a technique but it is an approach. What actions you perform next is governed by what you are doing currently
How to do Exploratory Testing
Following is a step by step process on How to do Exploratory Testing which is also called session based test management (SBTM Cycle):
- Create a Bug Taxonomy (classification)
- Categorize common types of faults found in the past projects
- Analyze the root cause analysis of the problems or faults
- Find the risks and develop ideas to test the application.
- Test Charter
- Test Charter should suggest
- what to test
- how it can be tested
- What needs to be looked
- Test ideas are the starting point of exploration testing
- Test charter helps determine how the end user could use the system
- Test Charter should suggest
- Time Box
- This method includes a pair of testers working together not less than 90 minutes
- There should not be any interrupted time in those 90 minutes session
- Timebox can be extended or reduced by 45 minutes
- This session encourages testers to react on the response from the system and prepare for the correct outcome
- Review Results:
- Evaluation of the defects
- Learning from the testing
- Analysis of coverage areas
- Debriefing:
- Compilation of the output results
- Compare the results with the charter
- Check whether any additional testing is needed
For Example, during exploratory execution, the following needs to be done:
- The mission of testing should be very clear
- Keep notes on what needs to be tested, why it needs to be tested and the assessment of the product quality
- Tracking of questions and issues raised during exploratory testing
- Better to pair up the testers for effective testing
- The more we test, more likely to execute right test cases for the required scenarios
It is very important to take a document and monitor the following
- Test Coverage - Whether we have taken notes on the coverage of test cases and improve the quality of the software
- Risks - Which risks need to be covered and which are all important ones?
- Test Execution Log - Recordings on the test execution
- Issues / Queries - Take notes on the question and issues on the system
Smarter exploratory testing finds more errors in less time.
Pros and Cons of Exploratory Testing
| Pro | Con |
|---|---|
|
|
Challenges of Exploratory Testing:
There are many challenges of exploratory testing and those are explained below:
- Learning to use the application or software system is a challenge
- Replication of failure is difficult
- Determining whether tools need to be used can be challenging
- Determine the best test cases to execute can be difficult
- Reporting of the test results is a challenge as the report doesn't have planned scripts or cases to compare with the actual result or outcome
- Documentation of all events during execution is difficult to record
- Don't know when to stop the testing as exploratory testing has definite test cases to execute.
When use exploratory testing?
Exploratory testing can be used extensively when
- The testing team has experienced testers
- Early iteration is required
- There is a critical application
- New testers entered into the team
Conclusion:
In Software Engineering, Exploratory testing is performed to overcome the limitations of scripted testing. It helps in improving Test Case suite. It empathizes on learning and adaptability.
What is Cross Browser Testing?
Cross Browser testing is a type of non-functional testing that lets you check whether your website works as intended when accessed through:
- Different Browser-OS combinations i.e., on popular browsers like Firefox, Chrome, Edge, Safari—on any of the popular operating systems like Windows, macOS, iOS and Android.
- Different devices i.e., users can view and interact with your website on popular devices—smartphones, tablets, desktops and laptops etc.
- Assistive Tools i.e., the website is compatible with assistive technologies like screen readers for individuals who are differently abled.
It’s about shipping releases that are as browser-agnostic as possible, which is key to delivering a uniform user experience on a diverse, ever-growing range of browsers/devices.
Why is Cross Browser Testing Important?
Imagine that you’re trying to access a site that archives every bongo cat meme in existence. Let’s say you’re doing it for the first time from your first ever MacBook Air.
You open Safari, type the URL, press Enter, and wait for it to load. When it does, none of the GIFs are loading. Buttons and text are all over the page. You check your connectivity and reload, just to see the same screen.
In the end, you’ll likely do one of two things–assume that the site has an issue and leave to return later, or assume that the site is broken and leave to find an alternative.
Browser vendors follow Open Web Standards, but they have their own interpretations of it. Since they each render HTML, CSS, and JavaScript in unique ways, thoroughly debugging your website’s source code is not enough to ensure that your website will look and behave as intended on different browsers (or different versions of a single browser).
So it falls to web developers to abstract browser differences. Cross browser testing helps with that by pinpointing browser-specific compatibility errors so you can debug them quickly. It helps ensure that you’re not alienating a significant part of your target audience–simply because your website does not work on their browser-OS.
What Features are Analyzed in a Browser Test?
Compatibility testing includes everything, but you may not always have the time for that.
To do it right, product teams constrain their testing with a test specification document (test specs) which outlines broad essentials—a list of features to test, what browsers/versions/ platforms to test on in order to meet the compatibility benchmark, test scenarios, timelines, and budget.
You can categorize the features that will undergo testing like this:
- Base Functionality: To ensure that basic functionality works on most browser-OS combinations. For example, you could be testing to verify that:
- All dialogs boxes and menus are working as intended
- All form fields accept inputs after validating them correctly
- Website handles first-party cookies (and features like personalization that are dependent on them) correctly
- Seamless touch input for mobiles or tablets
- Design: This ensures that the website’s appearance—fonts, images, and layout—matches the specifications shared by the Design team.
- Accessibility: Accounts for compliance with Web Content Accessibility Guidelines (WCAG) to enable differently-abled users to access the website.
- Responsiveness: Verifies that design is fluid and fits different screen sizes/orientations.
How Do I Select Browsers for Testing?
The sheer number of browsers, devices, and operating systems out there make it impossible to build for and test on every browser-OS combination that may exist. A more realistic goal is to focus your testing efforts towards maximizing your website’s reach within your target market. To do this, you’ll need to lock down the most critical browsers and versions:
- Based on popularity: Select the 10-20 most popular or commonly used browsers. Pick the top two platforms—like Android and iOS. This is to maximize your reach in any target market. This is typically what B2C (consumer facing) websites optimize for.
- Based on analysis: Look at your website’s traffic stats as captured by analytics tools (like Google Analytics or Kissmetrics) and break them down by device/browser. The aim is to find out:
- Which browser-OS combinations are most commonly used by your target audience
- What devices your website is generally viewed on
On the basis of these findings, pick the browsers-OS combinations that are most popular with your end-users. A simple rule of thumb is to prioritize testing on any browser-OS that gets over 5% share of traffic.
In order to make an informed decision specific to your target audience, refer to your traffic stats and combine those insights with our Test on The Right Devices report—which compiles browser-OS and device usage data in different markets.
The decision of which browsers and platforms to test on is usually in the hands of Business and Marketing teams (or the client). Goals defined by these teams help focus the product/testing team’s efforts in areas that will be most rewarding with least effort.
How is Cross Browser Testing Done?
Now that you’ve got the essentials covered, you can get around to running a test. Here’s a quick walkthrough of the steps involved:
- Establish a baseline: Before you begin cross browser testing, run all the design and functionality tests on your primary browser-usually Chrome. This will give you an idea of how the website was originally intended to look and behave.
- Create a testing plan and pick the browsers to test on: Use the test specification document to outline exactly what you’ll test. Then, as outlined in the segment above, pick browser-OS combinations to test on based on popularity and site traffic analysis.
- Execution—Automated vs Manual: Manual testing needs human testers to sequentially act out test scenarios. Automated testing ‘automates’ human interactions via code. A single test script, written by professional QAs using automation tools like Selenium, can execute a test scenario on multiple different browsers, as many times as needed. With precise error-reporting, bugs are easier to find and debug. Manual testing has room for (human) error. Depending on the website and scenarios that need to be tested, it can take anywhere between a few hours to several weeks to complete. Modern product teams allocate manual testers to exploratory testing-discovering UX pain points that a user might encounter while engaging with a touchpoint. For instance, a correctly-coded checkout form that doesn’t save form input on reload. The rest of the tests can be automated for quick, repeatable execution and near-instant feedback.
- Infrastructure: To account for website behavior when browsers are on different operating systems, you’ll need different devices. There are several ways to go about setting up your testing infrastructure: You can use emulators/simulators/virtual machines (VMs) and install browsers on them for testing. This approach is inexpensive, but note that a.) it’s not easily scalable, and b.) test results are unreliable on virtual mobile platforms (Android and iOS). Alternatively, if you have the resources to procure real devices and maintain their integrity over time, you can set up a device lab of your own. Another way is to use a cloud-based testing infrastructure (like Browserstack’s Live) to run your tests on a remote lab of secure devices and browsers—at a fraction of the cost of setting up your own device lab.
Once the tests are executed, results are shared across teams (using bug filing tools like Jira, Trello, GitHub, etc.). This keeps members of cross-functional teams on the same page and lets them work collaboratively on fixing issues.
When is Cross Browser Testing Done?
Depending on your role and workflow, you could be running cross-browser tests:
- During Development: Developers in Continuous Integration pipelines test new features to make sure they’re cross-browser compatible before pushing the changes to production.
- In Staging/Pre-Release: QA teams do this for every Release Candidate to make sure that no browser compatibility issues crop up in the latest version of the website.
Who Does Cross Browser Testing?
The short answer: Anyone who designs/develops for the Open Web.
You don’t have to know coding to make use of interactive cross browser testing tools. BrowserStack Live, for instance, is also used by marketers and web designers, who are quickly testing landing pages/new designs for cross-browser rendering and responsiveness.
Usually, QA teams execute test scenarios on multiple browsers to make sure the build meets browser compatibility benchmarks. UI teams run cross browser tests to find out how the website front-end fares on different devices and orientations.
Summary
Let’s quickly recap the 7 broad steps that are involved in cross browser testing:
- Identify which features you’ll test and write steps to specify the scenarios.
- Identify the browsers and platforms—either by popularity or site traffic analysis—that you’ll test on.
- Pick how you’ll execute the test scenarios—manually or automatically.
- Set up devices/browsers you’ll test on (or connect with a cloud-based provider).
- Execute test scenarios on browsers with the highest share of traffic, then move on to outliers.
- Document and share the test results with teams who can debug/fix issues.
- Continuously run cross browser compatibility tests to ensure that no bugs were missed.
What is Compatibility?
Compatibility is nothing but the capability of existing or living together. In normal life, Oil is not compatible with water, but milk can be easily combined with water.
What is Compatibility Testing?
Compatibility Testing is a type of Software testing to check whether your software is capable of running on different hardware, operating systems, applications, network environments or Mobile devices.
Compatibility Testing is a type of Non-functional testing
Types of Compatibility Tests
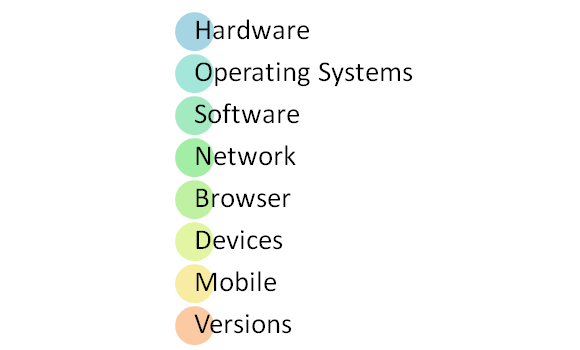
Let's look into compatibility testing types
- Hardware: It checks software to be compatible with different hardware configurations.
- Operating Systems: It checks your software to be compatible with different Operating Systems like Windows, Unix, Mac OS etc.
- Software: It checks your developed software to be compatible with other software. For example, MS Word application should be compatible with other software like MS Outlook, MS Excel, VBA etc.
- Network: Evaluation of performance of a system in a network with varying parameters such as Bandwidth, Operating speed, Capacity. It also checks application in different networks with all parameters mentioned earlier.
- Browser: It checks the compatibility of your website with different browsers like Firefox, Google Chrome, Internet Explorer etc.
- Devices: It checks compatibility of your software with different devices like USB port Devices, Printers and Scanners, Other media devices and Blue tooth.
- Mobile: Checking your software is compatible with mobile platforms like Android, iOS etc.
- Versions of the software: It is verifying your software application to be compatible with different versions of the software. For instance checking your Microsoft Word to be compatible with Windows 7, Windows 7 SP1, Windows 7 SP2, Windows 7 SP3.
There are two types of version checking in Compatibility Testing :
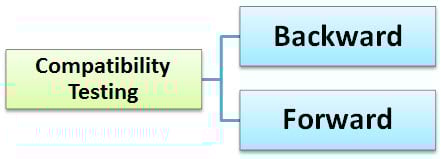
Backward Compatibility Testing
Backward Compatibility Testing is a technique to verify the behavior and compatibility of the developed hardware or software with their older versions of the hardware or software. Backward compatibility testing is much predictable as all the changes from the previous versions are known.
Forward Compatibility Testing
Forward Compatibility Testing is a process to verify the behavior and compatibility of the developed hardware or software with the newer versions of the hardware or software. Forward compatibility testing is a bit hard to predict as the changes that will be made in the newer versions are not known.
Tools for Compatibility Testing

- BrowserStack - Browser Compatibility Testing: This tool helps a Software engineer to check application in different browsers.
- Virtual Desktops - Operating System Compatibility: This is used to run the applications in multiple operating systems as virtual machines. n Number of systems can be connected and compare the results.
How to do Compatibility Testing
- The initial phase of compatibility testing is to define the set of environments or platforms the application is expected to work on.
- The tester should have enough knowledge of the platforms/software/hardware to understand the expected application behavior under different configurations.
- The environment needs to be set-up for testing with different platforms, devices, networks to check whether your application runs well under different configurations.
- Report the bugs. Fix the defects. Re-test to confirm Defect fixing.
Conclusion:
The most important use of compatibility testing is to ensure whether developed software works under different configurations (as stated in requirements documentation). This testing is necessary to check whether the application is compatible with the client's environment.
Reliability Testing
Reliability Testing is a software testing process that checks whether the software can perform a failure-free operation for a specified time period in a particular environment. The purpose of Reliability testing is to assure that the software product is bug free and reliable enough for its expected purpose.
Reliability means "yielding the same," in other terms, the word "reliable" means something is dependable and that it will give the same outcome every time. The same is true for Reliability testing.
Reliability Testing Example
The probability that a PC in a store is up and running for eight hours without crashing is 99%; this is referred as reliability.
Reliability Testing can be categorized into three segments,
- Modeling
- Measurement
- Improvement
The following formula is for calculating the probability of failure.
Probability = Number of failing cases/ Total number of cases under consideration
Factors Influencing Software Reliability
- The number of faults presents in the software
- The way users operate the system
- Reliability Testing is one of the key to better software quality. This testing helps discover many problems in the software design and functionality.
- The main purpose of reliability testing is to check whether the software meets the requirement of customer's reliability.
- Reliability testing will be performed at several levels. Complex systems will be tested at unit,assembly,subsystem and system levels.
Why to do Reliability Testing
Reliability testing is done to test the software performance under the given conditions.
The objective behind performing reliability testing are,
- To find the structure of repeating failures.
- To find the number of failures occurring is the specified amount of time.
- To discover the main cause of failure
- To conduct Performance Testing of various modules of software application after fixing defect
After the release of the product too,we can minimize the possibility of occurrence of defects and thereby improve the software reliability. Some of the tools useful for this are- Trend Analysis,Orthogonal Defect Classification and formal methods, etc..
Types of reliability Testing
Software reliability testing includes Feature Testing, Load Testing and Regression Testing
Feature Testing:-
Featured Testing check the feature provided by the software and is conducted in the following steps:-
- Each operation in the software is executed at least once.
- Interaction between the two operations is reduced.
- Each operation have to be checked for its proper execution.
Load Testing:-
Usually, the software will perform better at the beginning of the process and after that, it will start degrading. Load Testing is conducted to check the performance of the software under maximum work load.
Regression Test:-
Regression testing is mainly used to check whether any new bugs have been introduced because of the fixing of previous bugs. Regression Testing is conducted after every change or updation of the software features and their functionalities.
How to do Reliability Testing
Reliability Testing is costly compared to other types of testing. So Proper planning and management is required while doing reliability testing. This includes testing process to be implemented, data for test environment, test schedule, test points, etc.
To begin with reliability testing, tester has to keep following things,
- Establish reliability goals
- Develop operational profile
- Plan and execute tests
- Use test results to drive decisions
As we discussed earlier, there are three categories in which we can perform the Reliability Testing,-Modeling, Measurement and Improvement.
The key parameters involved in Reliability Testing are:-
- Probability of failure-free operation
- Length of time of failure-free operation
- The environment in which it is executed
Step 1) Modeling
Software Modeling Technique can be divided into two subcategories:
1. Prediction Modeling
2. Estimation Modeling
- Meaningful results can be obtained by applying suitable models.
- Assumptions and abstractions can be made to simplify the problems and no single model will suitable for all the situations.
The major differences of two models are:-
| Issues | Prediction Models | Estimation Models |
|---|---|---|
| Data Reference | It uses historical data | It uses current data from the software development. |
| When used in Development Cycle | It will be usually created before the development or testing phases. | It will be usually used at the later stage of Software Development Life Cycle. |
| Time Frame | It will predict the reliability in the future. | It will predict the reliability either for the present time or in the future time. |
Step 2) Measurement
Software reliability cannot be measured directly and hence, other related factors are considered in order to estimate the software reliability. The current practices of Software Reliability Measurement are divided into four categories:-
1. Product Metrics:-
Product metrics are the combination of 4 types of metrics:
- Software size: - Line of Code (LOC) is an intuitive initial approach for measuring the size of the software. Only the source code is counted in this metric, and the comments and other non-executable statements will not be counted.
- Function point Metric:- Function Pont Metric is the method for measuring the functionality of the Software Development. It will consider the count of inputs, outputs, master files, etc. It measures the functionality delivered to the user and is independent of the programming language.
- Complexity:- It is directly related to software reliability, so representing complexity is important. Complexity-oriented metric is a method of determining the complexity of a program's control structure, by simplifying the code into a graphical representation.
- Test Coverage Metrics:- It is a way of estimating fault and reliability by performing the complete test of software products. Software reliability means it is the function of determining that the system has been completely verified and tested.
2. Project Management Metrics
- Researchers have realized that good management can result in the better products.
- A good management can achieve higher reliability by using better development process,risk management process,configuration management process, etc.
3. Process Metrics
The quality of the product is directly related to the process. The process metrics can be used to estimate, monitor and improve the reliability and quality of software.
4. Fault and Failure Metrics
Fault and Failure Metrics are mainly used to check whether the system is completely failure-free. Both the types of faults found out during the testing process (i.e. before delivery) as well as the failure reported by users after delivery are collected, summarized and analyzed to achieve this goal.
Software reliability is measured in terms of mean time between failures (MTBF). MTBF consists of
- Mean to failure (MTTF): It is the difference of time between two consecutive failures
- Mean time to repair (MTTR): It is the time required to fix the failure.
MTBF = MTTF + MTTR
Reliability for good software is a number between 0 and 1.
Reliability increases when errors or bugs from the program are removed.
Step 3) Improvement
Improvement completely depends upon the problems occurred in the application or system, or else the characteristics of the software. According to the complexity of the software module,the way of improvement will also differ. Two main constraints time and budget, which will limit the efforts are put into the software reliability improvement.
Example Methods for Reliability Testing
Testing for reliability is about exercising an application so that failures are discovered and removed before the system is deployed.
There are mainly three approaches used for Reliability Testing
- Test-Retest Reliability
- Parallel Forms Reliability
- Decision Consistency
Below we tried to explain all these with an example.
Test-Retest Reliability

To estimate test-retest reliability, a single group of examinees will perform testing process only a few days or weeks apart. The time should be short enough so that the examinees skills in the area can be assessed. The relationship between the examinee's scores from two different administrations is estimated, through statistical correlation. This type of reliability demonstrates the extent to which a test is able to produce stable, consistent scores across time.
Parallel Forms Reliability

Many exams have multiple formats of question papers, this parallel forms of exam provide Security. Parallel forms reliability is estimated by administrating both forms of the exam to the same group of examinees. The examinees scores on the two test forms are correlated in order to determine how similarly the two test forms functions. This reliability estimate is a measure of how consistent examinees scores can be expected to across test forms.
Decision Consistency
After doing Test-Retest Reliability and Parallel Form Reliability, we will get a result of examinees either pass or fail. It is the reliability of this classification decision that is estimated in decision consistency reliability.
Importance of Reliability Testing
A thorough assessment of reliability is required to improve the performance of software product and process. Testing software reliability will help the software managers and practitioners to a great extent.
To check the reliability of the software via testing:-
- A large number of test cases should be executed for an extended period of time to find out how long the software will execute without failure.
- The test cases distribution should match the actual or planned operational profile of the software. The more often a function of the software is executed, the greater the percentage of test cases that should be allocated to that function or subset.
Reliability Testing Tools
Some of the Reliability testing tools used for Software Reliability are:
1. WEIBULL++:- Reliability Life Data Analysis
2. RGA:- Reliability Growth Analysis
3. RCM:-Reliability Centered Maintenance
Summary:
Reliability Testing is the important part of a reliability engineering program. More correctly, it is the soul of reliability engineering program.
Furthermore, reliability tests are mainly designed to uncover particular failure modes and other problems during software testing.
In Software Engineering, Reliability Testing can be categorized into three segments,
- Modeling
- Measurement
- Improvement
Factors Influencing Software Reliability
- The number of faults presents in the software
- The way users operate the system


Comments
Post a Comment